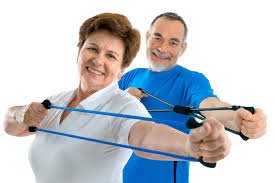
If you’ve been told you need to ‘stay active’ but standing exercises feel unsafe, painful, or simply out of reach right now — resistance bands used from a chair may be the single most effective fitness tool available to you.
Unlike free weights, machines, or floor exercises, seated resistance band exercises can be performed safely and effectively from a kitchen chair, wheelchair, or recliner. They require no gym membership, no large equipment, and no ability to stand. Yet the science is clear: resistance training — even from a seated position — builds genuine muscle strength, improves joint health, and fights the age-related muscle loss known as sarcopenia.
This guide is built specifically for adults 60 and over with limited mobility — whether you’re recovering from surgery (like a hip replacement), managing arthritis, living with a chronic condition, or simply finding that standing workouts no longer feel safe. We’ll walk you through everything: which bands to choose, how to set up, and 15 exercises organized into a complete full-body program.
Why Resistance Bands Are Ideal for Seniors with Limited Mobility
Resistance bands aren’t a ‘beginner’ tool or a compromise — they’re a legitimate training implement used by athletes and physical therapists alike. For seniors with limited mobility, they offer specific advantages that dumbbells and machines simply can’t match:
- Joint-friendly resistance: Bands provide progressive resistance that’s gentler on joints than free weights, reducing the risk of strain during vulnerable ranges of motion.
- Seated use is natural: Unlike most gym equipment, bands work just as effectively seated as standing. You don’t lose functionality by sitting.
- Scalable difficulty: Change the band color (tension level) or adjust your grip position to make any exercise easier or harder — no weight plates required.
- Safe to use alone: No spotter needed. If a band slips, nothing falls on you.
- Inexpensive and portable: A full set of quality resistance bands costs less than one month at most gyms and fits in a drawer.
- Proven results: Multiple clinical studies confirm that elastic resistance training produces comparable muscle and strength gains to free weight training in older adults.
💡 A 2019 systematic review in the Journal of Human Kinetics found that elastic resistance training is as effective as conventional resistance training for improving muscle strength in older adults — with a significantly lower injury profile.
Choosing the Right Resistance Band
Not all resistance bands are the same. For seated senior exercise, you have two main options:
Loop Bands (Mini Bands)
Flat, closed loops that work well for lower body exercises — wrapping around thighs or ankles. Less commonly used for upper body work from a chair.
Therapy / Flat Bands
Long, flat strips (typically sold by the yard or in pre-cut lengths). Used in physical therapy. Extremely versatile for seated exercises — you can loop them under your chair legs, hold two ends in your hands, or wrap around a doorknob.
Tube Bands with Handles
Cylindrical bands with plastic handles attached. The most user-friendly option for seniors — easier to grip and the handles are gentler on arthritic hands than flat bands.
Resistance levels by color (most brands follow this convention, but always check):
- Yellow / Tan: Extra light — ideal starting point for deconditioned seniors or post-surgical recovery
- Red: Light — good for most upper body exercises when starting out
- Green: Medium — challenge level for most seniors after 4–6 weeks of training
- Blue: Heavy — appropriate for stronger muscle groups (legs, back) after consistent training
- Black / Silver: Extra heavy — rarely needed for seated senior training
Our recommendation: start with light (red) and medium (green) bands and a set of tube bands with handles. This gives you enough variety for a complete program without overcomplicating things.
How to Set Up for Seated Band Exercises
Your chair matters. Use a:
- Firm, stable chair with no wheels (or a locked wheelchair)
- Height that allows your feet to rest flat on the floor
- Chair without armrests if possible — they can interfere with band movement
- Chair placed on non-slip flooring or with a mat underneath
Anchoring your band:
- Under your feet: Sit on the band with both ends in your hands — works for bicep curls, shoulder press, rows
- Under chair legs: Thread the band under the front legs of the chair for rows and chest exercises
- Door anchor: Attach a door anchor (often included with tube band sets) at various heights for a wider range of exercises
- Around a sturdy post or furniture leg: A stable anchor point for pulling exercises
⚠️ Safety check before every session: Inspect your bands for nicks, tears, or discoloration. A snapped band can cause injury. Replace bands that show any signs of wear.
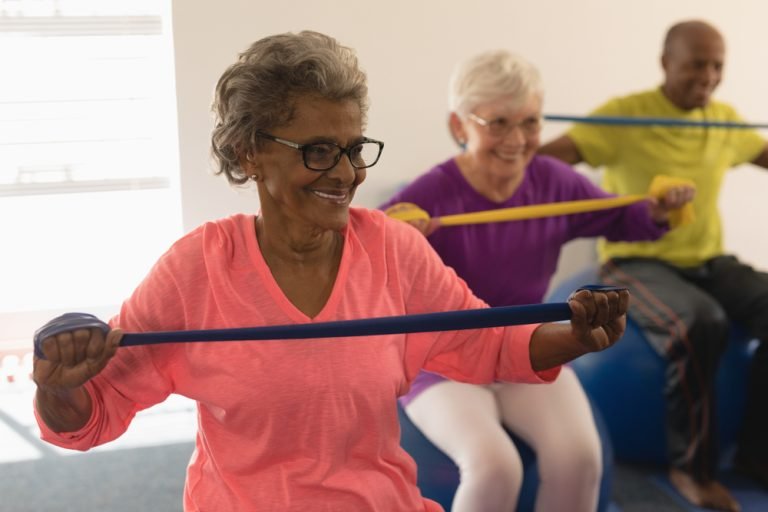
15 Seated Resistance Band Exercises for Seniors
This program covers your full body in three sections: upper body, core, and lower body. You don’t need to do all 15 in one session — we’ll show you how to build a manageable program at the end.
Upper Body Exercises
- Seated Bicep Curl | Targets: Biceps, forearms | Difficulty:
 Beginner
Setup: Sit with the band looped under both feet. Hold one end in each hand, palms facing up, arms extended down.
Movement: Curl both hands up toward your shoulders, squeezing your biceps at the top. Lower slowly.
Reps: 10–15 | Sets: 2–3 | Tip: Keep your elbows pinned at your sides throughout the movement. Don’t swing your arms.
- Seated Overhead Press | Targets: Shoulders, triceps, upper back | Difficulty: Moderate
Setup: Band looped under both feet. Hold ends at shoulder height, palms facing forward.
Movement: Press both hands overhead until arms are nearly straight. Lower slowly back to shoulder height.
Reps: 10–12 | Sets: 2–3 | Tip: Don’t lock elbows at the top. Keep your core gently engaged and avoid arching your back.
- Seated Row | Targets: Upper back, rhomboids, biceps | Difficulty: Moderate
Setup: Loop band around both feet or a sturdy anchor in front of you at seated height. Hold one end in each hand, arms extended forward.
Movement: Pull both hands back toward your hips, squeezing your shoulder blades together. Hold for 1 second, then extend forward.
Reps: 10–12 | Sets: 2–3 | Tip: Think about pulling with your elbows, not your hands. This activates the back muscles more effectively.
4. Chest Press (Seated) | Targets: Chest, front shoulders, triceps | Difficulty: Moderate
Setup: Loop band around your upper back, holding one end in each hand at chest height. Anchor the center of the band behind the chair back if possible.
Movement: Press both hands forward until arms are nearly extended, then return slowly.
Reps: 10–12 | Sets: 2–3 | Tip: If the band slips, use a door anchor behind you at chest height instead.
- Lateral Raise | Targets: Side deltoids, shoulder stabilizers | Difficulty: Beginner
Setup: Band looped under feet. Hold one end in each hand at your sides, arms slightly bent.
Movement: Raise both arms out to the sides until they reach shoulder height. Lower slowly.
Reps: 10–12 | Sets: 2 | Tip: Use a lighter band than you think you need — this is a small muscle group that fatigues quickly.
- Tricep Extension (Seated Overhead) | Targets: Triceps | Difficulty: Moderate
Setup: Hold the band with both hands, one hand at the back of your neck and one hand higher above your head.
Movement: The top hand holds the band still as an anchor; extend the lower arm upward to straighten. Lower slowly.
Reps: 10–12 per arm | Sets: 2 | Tip: Keep the upper arm still — only the forearm moves.
- Front Raise | Targets: Front shoulders, upper chest | Difficulty: Beginner
Setup: Band looped under feet. Hold one end in each hand, arms at your sides, palms facing back.
Movement: Raise both arms straight out in front of you to shoulder height. Lower slowly.
Reps: 10–12 | Sets: 2 | Tip: Can also be done one arm at a time to reduce band tension.
Core and Torso Exercises
- Seated Trunk Rotation | Targets: Obliques, core stabilizers | Difficulty: Beginner
Setup: Hold the band with both hands in front of you, arms extended. Anchor band to a fixed point at one side.
Movement: Slowly rotate your torso away from the anchor, keeping your hips still. Return to center. Complete all reps on one side before switching.
Reps: 10–12 per side | Sets: 2 | Tip: Move through a comfortable range only. This is excellent for spine health and posture.
- Seated Pallof Press | Targets: Core stability, anti-rotation | Difficulty: Moderate
Setup: Anchor band to one side at chest height. Sit perpendicular to the anchor, holding both ends at your chest.
Movement: Press your hands straight out in front of you, hold for 2 seconds, then bring them back to your chest. The band will try to pull you sideways — resist it.
Reps: 8–10 per side | Sets: 2 | Tip: This builds deep core strength and is particularly valuable for fall prevention.
Lower Body Exercises
- Seated Leg Extension | Targets: Quadriceps | Difficulty: Beginner
Setup: Loop band around one ankle and anchor under the chair leg on the same side. Sit toward the front of the chair.
Movement: Straighten your leg out in front of you against the band’s resistance. Slowly lower back down.
Reps: 12–15 per leg | Sets: 2–3 | Tip: Excellent for maintaining quad strength — critical for standing up from a chair, a key predictor of longevity in seniors.
- Seated Hip Abduction | Targets: Hip abductors, outer thighs, glutes | Difficulty: Beginner
Setup: Loop a mini band or tied flat band around both thighs, just above the knees. Sit with feet flat on the floor, hip-width apart.
Movement: Press both knees outward against the band, hold for 2 seconds, then return to center.
Reps: 12–15 | Sets: 2–3 | Tip: This is one of the most important exercises for hip stability and fall prevention. Particularly valuable for anyone who has had or is preparing for a hip replacement.
- Seated Calf Raise with Band | Targets: Calves, ankles | Difficulty: Beginner
Setup: Loop band over both thighs. Place the balls of your feet on the floor.
Movement: Press the balls of your feet into the floor and raise your heels, working against the band’s downward pressure on your thighs.
Reps: 15–20 | Sets: 2–3 | Tip: Calf strength and ankle stability are major factors in fall prevention. This exercise can be done daily.
- Seated Hamstring Curl | Targets: Hamstrings, back of thigh | Difficulty: Beginner
Setup: Anchor band to a low fixed point in front of you. Loop around one ankle. Sit at the edge of your chair.
Movement: Curl your foot back under the chair, bending the knee. Return slowly.
Reps: 12 per leg | Sets: 2–3 | Tip: The hamstrings are often underdeveloped in seniors. Strong hamstrings reduce knee pain and improve walking gait.
14. Seated Hip Flexion | Targets: Hip flexors, lower core | Difficulty: ⭐ Beginner
Setup: Loop band around one ankle, anchor under the opposite foot. Sit tall.
Movement: Lift the banded knee toward your chest, against the band’s resistance. Lower slowly.
Reps: 10–12 per leg | Sets: 2 | Tip: Strong hip flexors help with stair climbing, getting in and out of cars, and walking speed.
15. Seated Glute Squeeze with Band | Targets: Glutes, hip stabilizers | Difficulty: ⭐ Beginner
Setup: Loop mini band around both ankles. Sit at the edge of your chair, feet hip-width apart.
Movement: Without moving your feet, press both feet outward against the band. Hold for 3–5 seconds, release. Focus on squeezing the glutes.
Reps: 10–15 | Sets: 2–3 | Tip: The glutes are the largest muscle group in your body. Weak glutes contribute to lower back pain, hip pain, and falls. This is a key exercise for seniors.
Sample Workout Programs
Beginner: 2 Days Per Week (Weeks 1–4)
Goal: Build the habit, master technique, and begin stimulating muscle growth. Each session takes 20–25 minutes.
Day A — Upper Focus:
- Seated Bicep Curl — 2 sets × 12 reps
- Seated Row — 2 sets × 12 reps
- Lateral Raise — 2 sets × 10 reps
- Seated Hip Abduction — 2 sets × 12 reps
- Seated Calf Raise — 2 sets × 15 reps
Day B — Lower Focus:
- Seated Leg Extension — 2 sets × 12 reps per leg
- Seated Hamstring Curl — 2 sets × 12 reps per leg
- Seated Hip Flexion — 2 sets × 10 reps per leg
- Seated Overhead Press — 2 sets × 10 reps
- Seated Trunk Rotation — 2 sets × 10 reps per side
Intermediate: 3 Days Per Week (Weeks 5–12)
Goal: Build visible muscle, improve functional strength, and establish a consistent training routine.
Monday — Full Body A:
- Seated Row — 3 × 12
- Seated Overhead Press — 3 × 10
- Seated Leg Extension — 3 × 12 per leg
- Seated Hip Abduction — 3 × 15
- Seated Pallof Press — 2 × 10 per side
Wednesday — Full Body B:- Bicep Curl — 3 × 12
- Chest Press — 3 × 10
- Seated Hamstring Curl — 3 × 12 per leg
- Seated Glute Squeeze — 3 × 12
- Front Raise — 2 × 12
Friday — Full Body C:
- Tricep Extension — 3 × 12 per arm
- Seated Row — 3 × 12
- Seated Hip Flexion — 3 × 10 per leg
- Seated Calf Raise — 3 × 20
- Trunk Rotation — 2 × 12 per side
How to Progress Over Time
The most common mistake seniors make with resistance bands is staying on the same band forever. Progression — gradually increasing the challenge — is what actually builds strength. Here’s how to do it safely:
- Add reps first: When you can complete all sets with good form and no struggle, add 2–3 reps per set before moving up in resistance.
- Then increase resistance: Move up one band color only when current band feels consistently easy for all reps.
- Slow the tempo: Slowing the lowering (eccentric) phase from 1 second to 3 seconds dramatically increases difficulty without changing bands.
- Add a pause: Hold the end position for 2–3 seconds on exercises like rows and leg extensions to increase time under tension.
- Increase sets: Progress from 2 sets to 3 sets as your endurance improves.
Consistent progression is also the key to fighting sarcopenia — age-related muscle loss. Muscle requires progressive stimulus to maintain and rebuild.
Support Your Training with Nutrition
Exercise without adequate nutrition is far less effective, especially for seniors. Protein is the building block of muscle, and most adults over 65 consume far less than they need. If you’re doing resistance training, aim for 1.2–1.6 grams of protein per kilogram of body weight per day. For a 150-pound (68kg) person, that’s roughly 82–109 grams of protein daily.
Read our complete guide to protein intake for seniors over 60 for food sources, supplement options (including whey and collagen), and meal timing strategies that maximize muscle protein synthesis.
Using These Exercises from a Wheelchair
Every exercise in this guide can be performed from a wheelchair with minimal or no modification. The key differences are:
- Lock your wheels before beginning any exercise
- Use your armrests as a stability reference, but don’t grip them during exercises that require free arm movement
- For lower body exercises, anchor bands to the wheelchair frame where appropriate
- Focus on upper body and core exercises — these will provide the greatest functional benefit for wheelchair users
For a complete program specifically designed for wheelchair users, visit our wheelchair exercise guide for seniors.
Frequently Asked Questions
How often should seniors do resistance band exercises?
For most seniors, 2–3 times per week with at least one rest day between sessions is ideal. Muscles need 48–72 hours to recover and rebuild after resistance training. More frequent training isn’t more effective — recovery is where the gains happen.
Are resistance bands safe for seniors with osteoporosis?
Yes — resistance bands are generally considered safer than free weights for seniors with osteoporosis because they don’t involve heavy loading or impact. The resistance is progressive and controllable. Always consult your doctor or physical therapist before starting, particularly if you have advanced osteoporosis or fracture history.
Can resistance bands help with arthritis?
Research supports resistance training as beneficial for arthritis — it strengthens the muscles around affected joints, reducing the load on the joint itself. The low-impact nature of band training makes it particularly suitable. Start with the lightest resistance and focus on pain-free range of motion.
What if I can only use one arm?
Every exercise in this program can be modified for one-arm use. Simply hold both ends of the band in your working hand, or fold the band to increase resistance. Single-arm training is common and effective.
How long until I see results?
Most seniors notice improved strength and function within 4–6 weeks of consistent training. Visible muscle changes typically take 8–12 weeks. Improvements in daily activities — getting up from a chair, carrying groceries, climbing stairs — often happen faster than you’d expect.
Do I need to warm up?
A brief warm-up reduces injury risk and improves performance. Spend 5 minutes doing gentle seated movements: shoulder rolls, ankle circles, light arm swings, and slow neck rotations. This is enough to warm the muscles and lubricate the joints before resistance work.
Start Building Strength Today
Seated resistance band training is one of the most accessible, effective, and underused fitness tools available to seniors with limited mobility. You don’t need to stand. You don’t need a gym. You don’t need expensive equipment. You need a chair, a band, and 20 minutes.
Explore the full Se7en Symbols senior fitness library:
Consistency beats intensity at every age. Pick two exercises from this guide, do them today, and build from there.
⚠️ Medical Disclaimer: This article is for informational purposes only and does not constitute medical advice. Consult your physician or physical therapist before beginning any new exercise program, especially if you have a recent surgery, cardiovascular condition, joint replacement, or other medical concern.